Synchronization using Batches
Description
In a disconnected application a user might have been disconnected for quite some time. During this time they may have made a number of edits on their client-side device. When they get their connection back, the user might click a synchronize button in order to push their edits back to the server. However, because they made a large number of edits, it is quite likely that the server might take a while to actually process all of the changes that the user made. While the server is processing information the user/client will be waiting for a response and, if the server takes to long, the client-side device could time out before recieving said response. One way to avoid this problem is to send the user's edits to the server in batches, such that the user can get feedback as to what progress has been made.
Add Synchronization using Batches to a Detail View
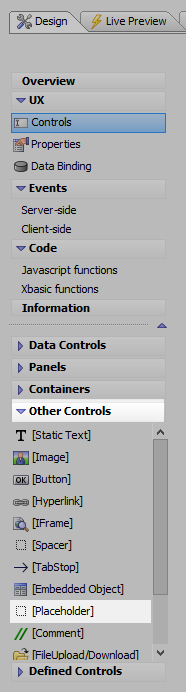
In the UX Builder on the UX Controls page, open the Other Controls menu. Click on [Placeholder] to add a placeholder control to the component.
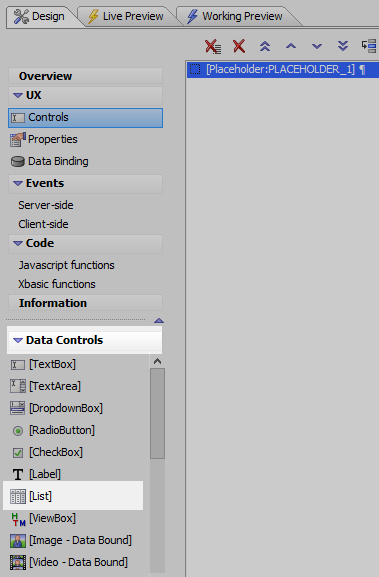
Open the Data Controls menu. Click the [List] option to add a list control.
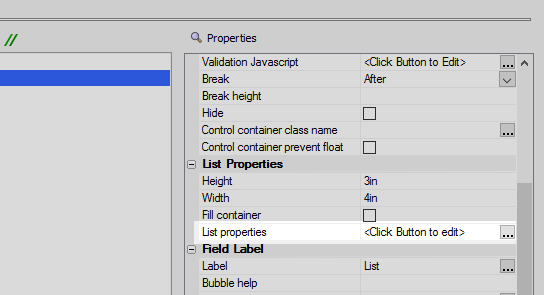
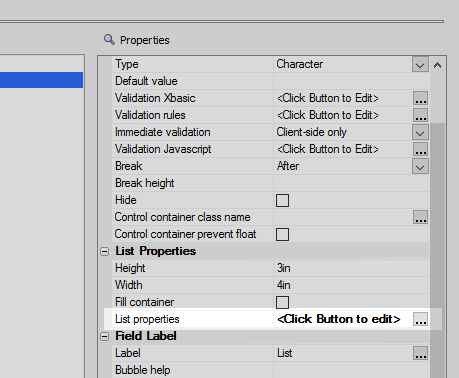
In the properties list click on the
 next to the 'List properties' property, in the List Properties section,
to open the List Builder.
next to the 'List properties' property, in the List Properties section,
to open the List Builder.
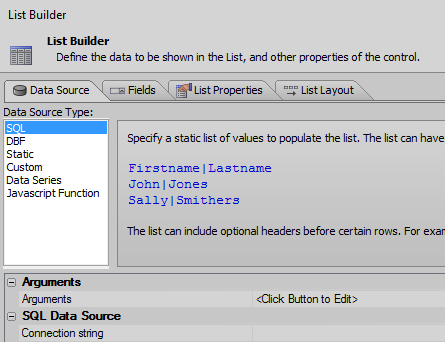
On the Data Source pane set the 'Data Source Type' to SQL.
Click the
button next to the Connection string property and select the Northwind database.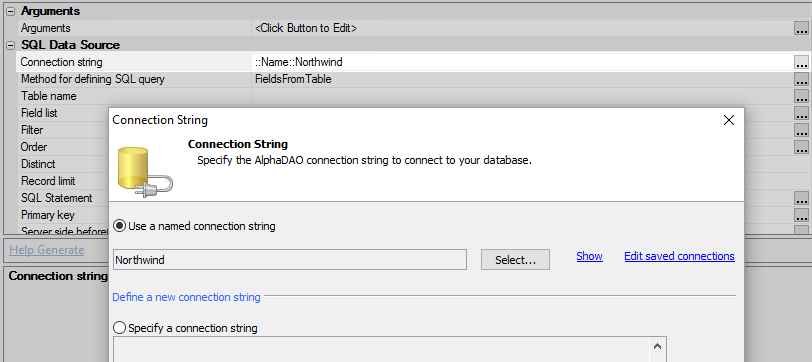
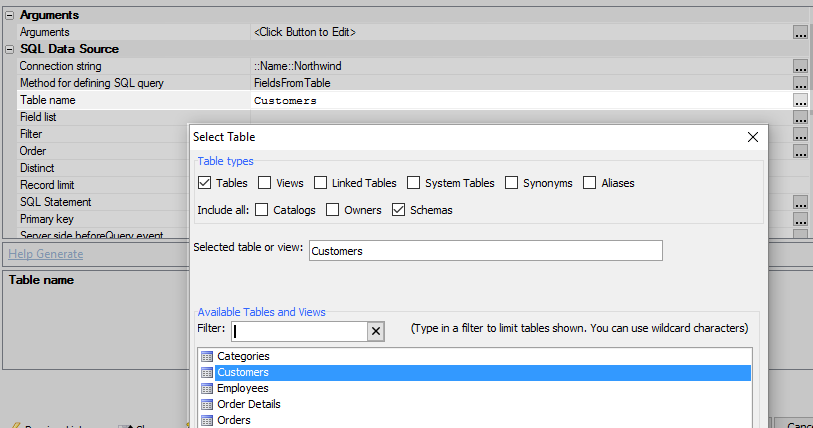
For the Table name property select the 'Customers' table
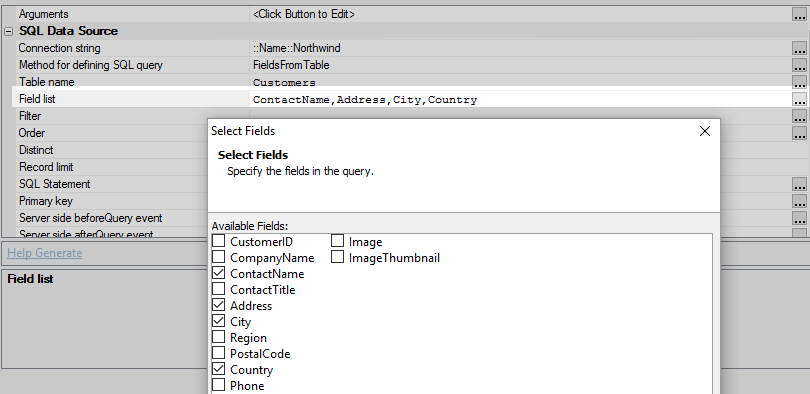
For the 'Field list' property select the 'ContactName', 'Address', 'City', and 'Country' fields.
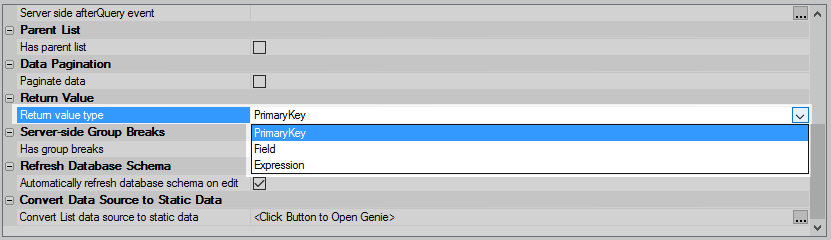
In the Return Value section of the Data Source pane, set the 'Return value type' dropdown to 'PrimaryKey'
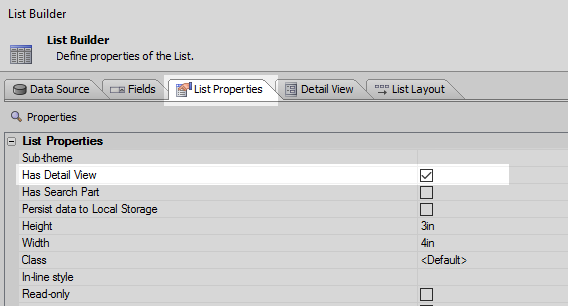
Open the List Properties pane. Check the 'Has Detail View' property in the List Properties section.
Open the List Layout pane. Use the blue > arrows to move the four fields from the Customers table from the Available Fields list to the Columns in List. Click OK to close the List Builder.

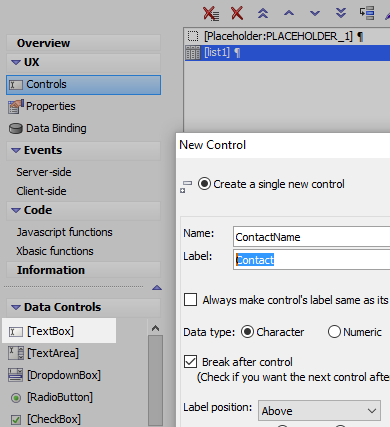
On the UX Controls page, open the Data Controls menu. Click on the [TextBox] option to add a textbox control to the component. Name this control 'ContactName' to match the ContactName field.
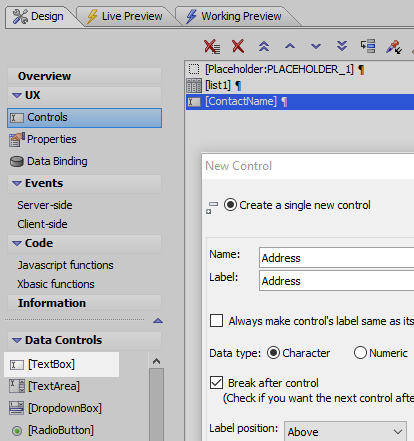
Add a second [TextBox] control to the component, name this textbox 'Address'.
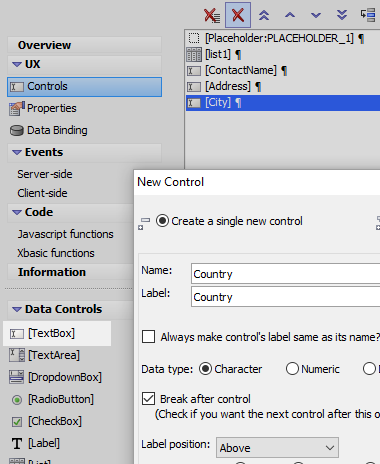
Add a third [TextBox] control to the component, name this one 'City'.
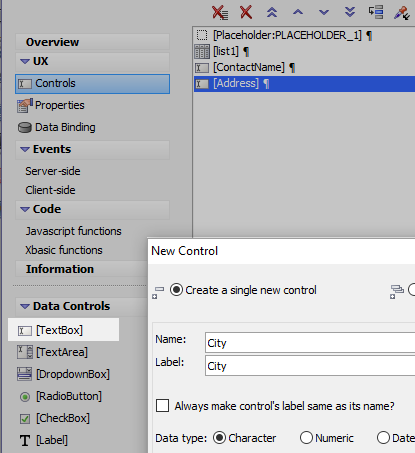
Add a final [TextBox] control to the component, name this 'Country'.
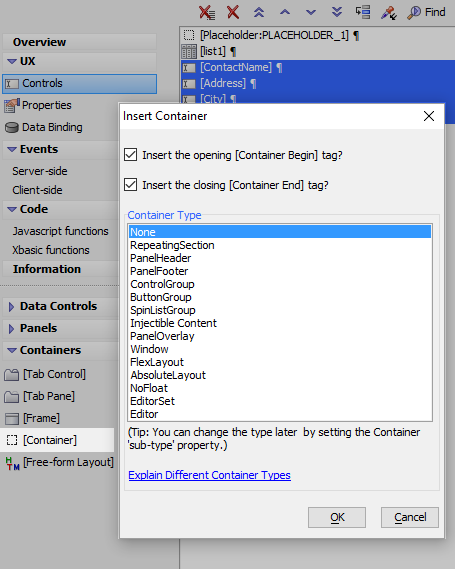
Highlight the four textbox controls and then open the Containers menu.

Click on the [Container] option. From the Container Type list select None. The container should now encompass the textbox controls.
Highlight the List Control and click on the List properties property to open the List Builder again.
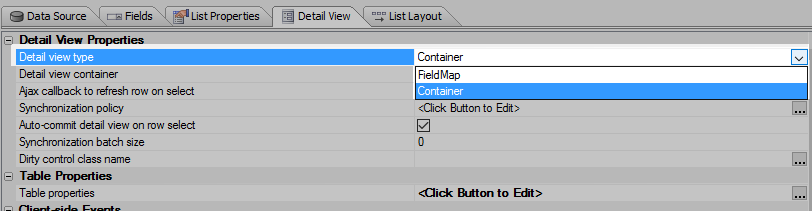
Open the Detail View pane. For the Detail view type property select 'Container'
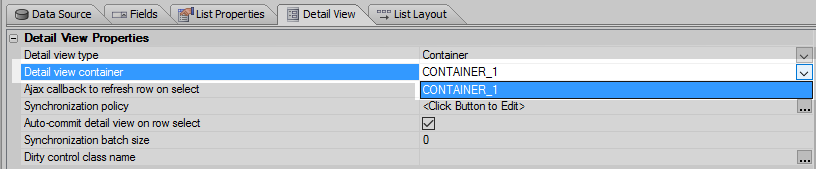
For the Detail view container property select CONTAINER_1 from the dropdown, this is the container that includes the textbox controls.
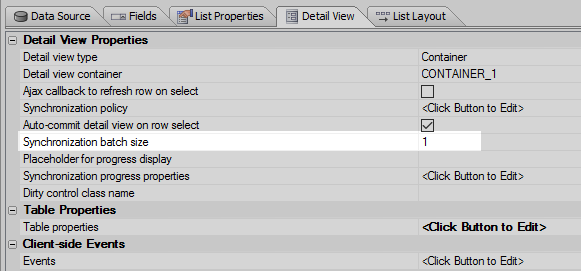
Set the Synchronization batch size property to 1. In a normal application this number would be larger as you would most likely not want to receive an update on the client every time a row of data was pushed to the server.
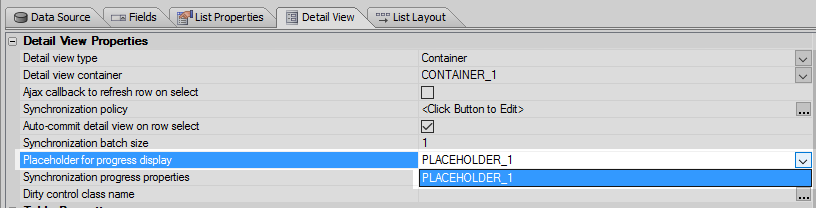
Set the 'Placeholder for progress display' property to be 'PLACEHOLDER_1', or the name of the placeholder defined in the first step.
Click the
button next to 'Synchronization progress properties' to open the Synchronization Progress Settings.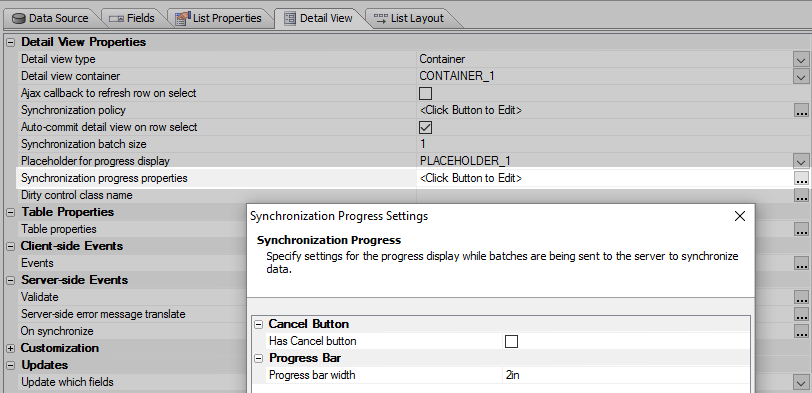
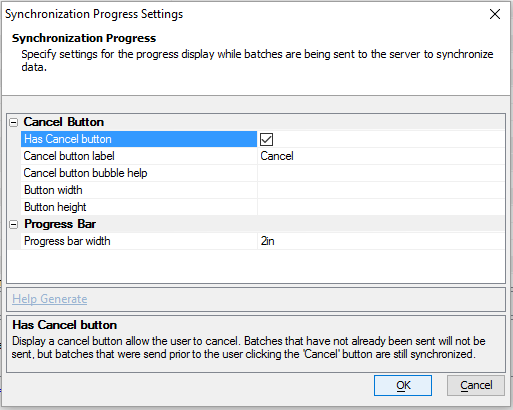
Check the Has Cancel button checkbox. Click OK
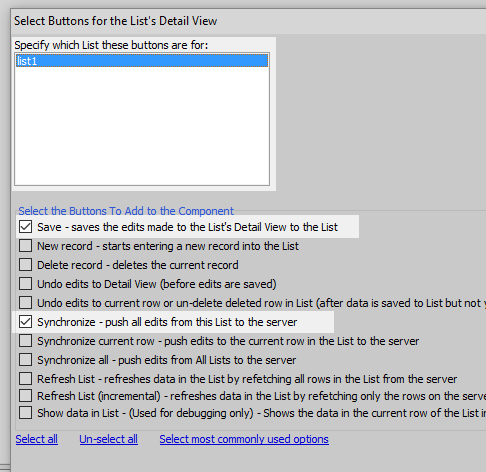
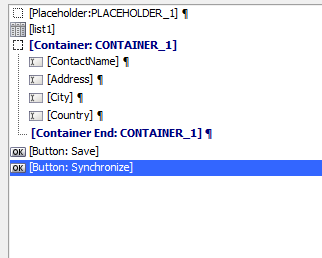
Click OK to close the List Builder. On the UX Controls page open the 'Defined Controls' menu. Click on the 'List-Detail View-Buttons' option.
On the 'Select Buttons for the List's Detail View' dialog highlight the list control, 'list1'. Check the 'Save' and 'Synchronize' checkboxes. Click OK.
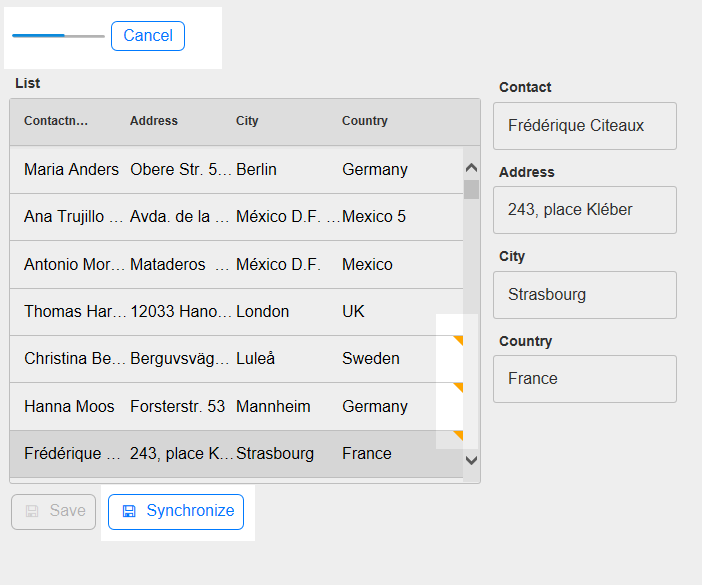
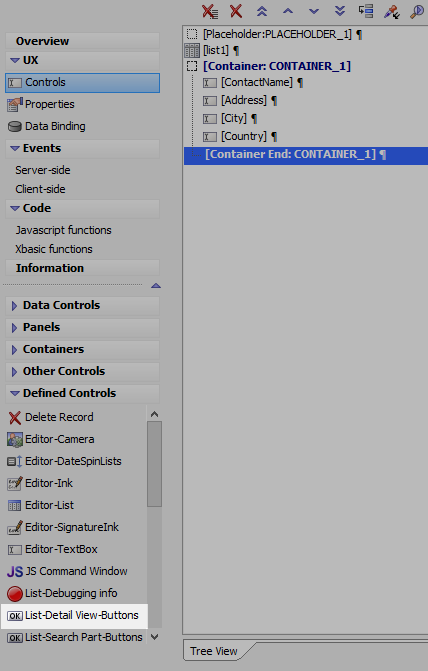
The final component:
Now run the component in Live preview. Click on a number of rows and make edits to them in the Detail View. Here Dirty rows appear marked with a yellow triangle.
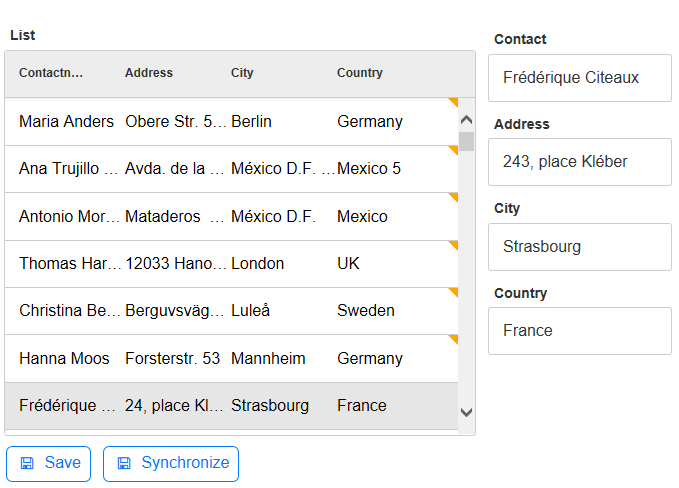
When you have made a number of edits, say 8 to 10, click the Save button, then click synchronize. You should see the synchronization progress bar appear in the top part of the screen. In this screen shot the server has not processed all of the batches, as a result the progress bar is only half way complete and some of the rows are still marked as dirty.